Health

30+ Horrible Habits That Absolutely Destroy Your Teeth

2. Eating Ice Cubes Eating ice cubes seems harmless enough. You can get your cold fix without any of the sugar that you would typically find… Trista Smith - June 5, 2022

Nobody looks forward to sitting in a dentist’s chair while you get your mouth numbed and then have to watch the dentist drill and file your teeth for several hours. Heck, some can’t even get passed those stubborn mouth x-rays. That means you may skip the dentist more than you should, or all together. Sure, you brush and floss two times a day, but is that really enough? Probably not. You may have some habits that are absolutely destroying your teeth. Please keep reading to learn about bad habits that many people do without realizing they are harming their oral health. Try to stop right away if you do any of these habits that destroy your teeth!

Shutterstock

ADVERTISEMENT - CONTINUE READING BELOW

32. Whitening Your Teeth Excessively

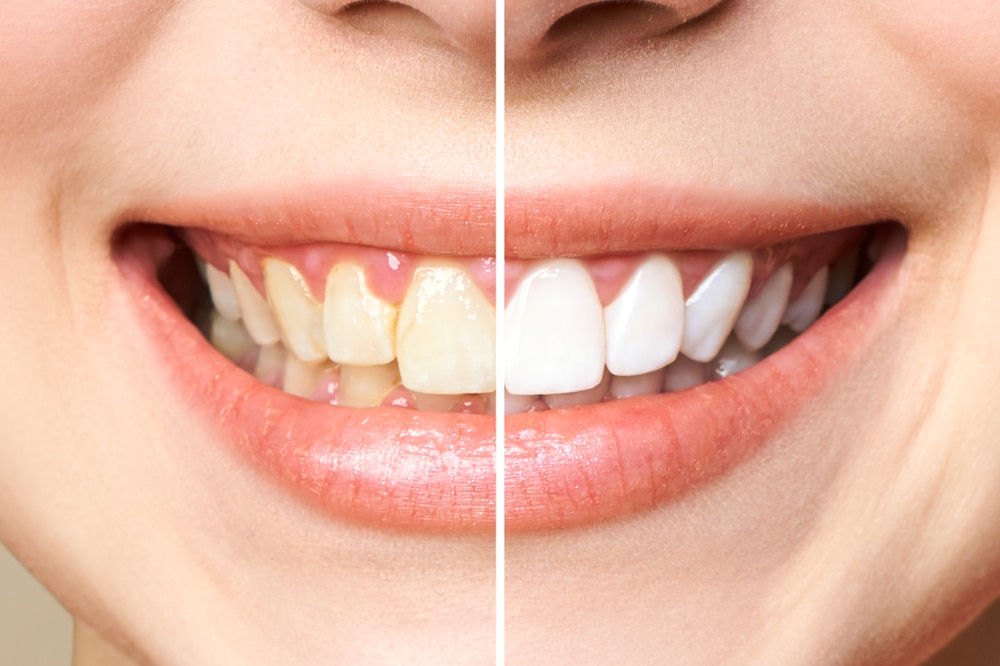
We all want a shiny white smile, but if you are whitening your teeth regularly, you may be doing a lot of harm. Over-the-counter teeth whiteners and especially homemade remedies can weaken the enamel of your teeth and cause it to erode when you brush. In addition to causing enamel loss, teeth whiteners can expose the nerves in your teeth, leading to teeth sensitivity. If you want your teeth to get whitened, schedule a whitening with your dentist or ask at your next dental check-up what whitener he or she recommends. The last thing you want is teeth that look white but are decaying as a result.

Shutterstock

ADVERTISEMENT - CONTINUE READING BELOW

31. Not Flossing

And no, we are not talking about the dance move from a few years back. Flossing is one of the most important things you can do to protect your oral health, and most people do not floss regularly. And while most people brush their teeth regularly – the alternative is having atrocious breath that will melt off people’s eyebrows – flossing is not nearly as common as it should be. When you floss, you get out the bits of food that can become stuck between your teeth, which create an ideal environment for bacteria to thrive and cause cavities. Start making flossing a priority before you go to bed each night.

Shutterstock

ADVERTISEMENT - CONTINUE READING BELOW

30. Consuming Sports Drinks

Sports drinks are marketed as a healthy drink that restores your body’s electrolyte balance after a workout. While they can be beneficial for athletes who are regularly engaging in high-intensity workouts, the fact is that most people condo not need them. They are very high in sugar, so they are full of empty calories that are anything but healthy. And that sugar attacks your teeth. One of the best things that you can do for your teeth is to severely limit your sugar intake and be mindful of the ways where you may be getting much more sugar than you realized. And if you are a sports drinks fan, those beverages are a good place to start. Another sugary culprit to look out for is fruit juice.

Shutterstock

ADVERTISEMENT - CONTINUE READING BELOW

29. Chewing Very Hard Food

Some people enjoy chewing on very hard food, such as the ice that may be left at the bottom of the cup or candy that they just want to crunch down on. The problem is that chewing on very hard food causes trauma to the teeth, leading to microfractures, worn edges, and other problems. Additionally, the hard food can create holes in the teeth that are the perfect hiding spot for cavity-causing bacteria. If you have a habit of eating very hard food, your best option is to schedule an appointment with your dentist to get your teeth checked out. And if you have not had your teeth cleaned in at least six months, schedule one today.

Shutterstock

ADVERTISEMENT - CONTINUE READING BELOW

28. Brushing Your Teeth With Abrasive Substances

Your grandmother may recommend brushing your teeth with baking soda to give you a whiter smile, or you may prefer using toothpaste that has micro pearls to help sweep excess food off of your teeth. But experts suggest that using abrasive substances, such as baking soda and toothpaste with micro pearls, to brush your teeth can do more harm than good. The abrasives can wear away the enamel, exposing the inner part of your teeth and also speeding up the process of tooth decay. Brush twice a day with a low-abrasive fluoride toothpaste, and follow up with floss.

Shutterstock

ADVERTISEMENT - CONTINUE READING BELOW

27. Eating Gummy Candy

You know that sugar is bad for your teeth. There is no secret about how harmful it is. The bacteria in your mouth the cause cavities rely on sugar to fuel them, so eating sugary foods or drinking sugary drinks is creating a feast for them. Hello, cavities! But not all sugar is created equal, and there are some ways to consume sugar that are less destructive to your teeth than others. The real bad guy to be aware of is gummy candy. Gummy candy may be fun to eat, but it gets stuck in between your teeth much easier than other foods and drinks that are fully of sugar. The result is that cavities can form in between your teeth, where your toothbrush does not get, and go undetected until they may already be causing too much pain. If you or your kids do eat gummy candy, make sure to brush and floss immediately afterwards so that the sugar does not have time to turn into cavities.

Shutterstock

ADVERTISEMENT - CONTINUE READING BELOW

26. Using Cough Drops

Cough drops are a convenient way of putting the brakes on a persistent cough, but they should not be considered healthy and can actually harm your teeth. One reason why is because they are loaded with sugar. If you need to use a cough drop, brush your teeth afterwards to wash out the sugar before it becomes a feast for the bacteria that cause cavities. You don’t want to fix a cough at the price of having to deal with cavities later! And make sure that you use cough drops sparingly. Take one only when you are struggling with a cough and stop using them when your cough has resolved.

Shutterstock

ADVERTISEMENT - CONTINUE READING BELOW

25. Giving Babies Bottles at Night

If you have an infant or toddler, you may be tempted to give your child a bottle to go to bed with. The sucking can be soothing and help the child fall asleep, and a bottle can be a comfort object. But this can actually set your baby up for early teeth decay, as the sugars in formula, juice, or milk can bathe his or her teeth in sugar overnight. After you have brushed your child’s teeth for the night, doctors advise no more bottles. They should never be in the crib, and not only for the sake of your child’s teeth. Falling asleep while drinking can increase the risk of aspirating, causing your child to stop breathing. On that note, while sucking can be very soothing for babies, too much sucking is bad for their teeth. The teeth can grow in deformed, causing significant problems.

Shutterstock

ADVERTISEMENT - CONTINUE READING BELOW

24. Playing Sports Without a Mouth Guard

For reasons detailed below, you should think twice before sleeping with a mouth guard. But if you play contact sports, you should always wear a mouth guard when practicing and when in a game. Contact sports include hockey, football, rugby, boxing, wrestling, and judo, to name a few. When things get rough, your teeth could get chipped or even completely knocked out. If you are an amateur who enjoys playing on weekends, you can get a simple mouth guard from a pharmacy. If you play more seriously, consider visiting your dentist to have one made professionally.

Shutterstock

ADVERTISEMENT - CONTINUE READING BELOW

23. Not Drinking Enough Water

If you had a dollar for every time you heard that drinking water is important for your health, you would probably be a rich person. But for the record, in case you haven’t heard yet, drinking water is really, really important for your health! No, your teeth won’t shrivel up and die if you don’t get enough water, but swishing water around in your mouth can be a stop-gap if you don’t have the chance to brush your teeth right after eating. You can quickly wash away excess food that might be stuck in your teeth. Additionally, after you consume something that can cause stains, such as coffee, tea, or wine, a drink of water can wash away the tannins, which are the components that cause stains. And again, though your teeth can’t get dehydrated, your gums can!

Shutterstock

ADVERTISEMENT - CONTINUE READING BELOW

22. Binge-Eating

Binge-eating refers to eating large amounts of food all at once and can be associated with mental health problems. Burt binge-eating is specifically bad for your teeth for several reasons. One is that people who binge eat do not generally consume nutritious foods that contain the vitamins, minerals, other nutrients that are necessary for good oral health. Another is that binge-eating usually occurs outside of regular mealtimes, and the result of not eating at regular times is acid builds up inside the mouth that can harm the teeth. Binge-eating also tends to involve a lot of sugar, which is what bad bacteria feed on. And finally, binge eaters who vomit to purge the excess calories are causing damage to their teeth because of the stomach acid that washes away enamel.

Shutterstock

ADVERTISEMENT - CONTINUE READING BELOW

21. Not Going to the Dentist

Who wants to spend an hour of their lives having someone give them a shot in their mouths and then drill on their teeth? Probably very few people would volunteer… but far too many people skip their regular dental check-ups. Aim for getting your teeth cleaned by a professional every six months. If you have not had a cleaning in at least that long, schedule one today! Professional cleanings are not the same as brushing and flossing every day; the hygienist who cleans your teeth will remove any plaque that has built up and also examine your mouth for problems that may be forming, including gingivitis, cavities, and oral cancer. If there are pressing concerns, he or she will advise the dentist to schedule an appointment to get those problems taken care of.

Shutterstock

ADVERTISEMENT - CONTINUE READING BELOW

20. Drinking Lemon Water

Studies have shown numerous benefits to drinking lemon water. The Cleveland Clinic says that drinking a glass of lemon water first thing in the morning helps prevent kidney stones. It provides a burst of Vitamin C, aids digestion, may help reduce dependence on sugary beverages, protects cells from the damage caused by oxidative stress, and boosts potassium intake. However, lemon water is one of the worst things you can drink for dental health. In fact, the American Dental Association (ADA) recommends that you limit all acidic drinks. That is especially those with citrus, including lemon juice, grapefruit juice, and orange juice. If you do want to start your day off with some lemon water, do your teeth a favor and drink it with a reusable straw. Wait one hour after drinking lemon water. Then brush your teeth with an ADA-approved toothpaste that contains fluoride. Why? So that the softened enamel can re-harden.

Shutterstock

ADVERTISEMENT - CONTINUE READING BELOW

19. Chewing Pencils Destroys Your Teeth

A common nervous habit that many people develop in childhood is chewing pencils. If you struggled with test anxiety as a kid, you might have chewed on your pencil before or while taking a test to help soothe yourself. While pencil-chewing may not be as damaging as, say, smoking, it can lead to or worsen a condition in the mouth called hyposensitivity. It means that the mouth is damaged so that the person cannot feel sensations as they normally would. In addition to hyposensitivity, pencil-chewing can cause cracks and fractures in the teeth. The habit can also damage the lining of the mouth and leave the person more susceptible to everyday pathogens, such as the cold and flu virus. Those splinters can also damage existing dental work, such as fillings or crowns.

Shutterstock

ADVERTISEMENT - CONTINUE READING BELOW

18. Having Alcoholic Beverages

Did you know that drinking too much alcohol can harm your teeth in addition to all of these problems? Heavy drinking is having more than eight drinks (remember that a drink is not necessarily how much you can fit into one glass) per week for women or 15 drinks per week for men. Heavy drinking is associated with canker sores, which can make brushing too painful, and it can lead to tooth decay, along with gum disease, and even oral cancer. Moderate drinking is having no more than one drink per day for women and two drinks per day for men, and even moderate drinking can lead to tooth-staining and tooth decay. You should alternate one glass of water with every drink. Make sure that you brush and floss your teeth after drinking to eliminate all of the sugar in the alcohol that builds on the teeth.

Shutterstock

ADVERTISEMENT - CONTINUE READING BELOW

17. Constant Snacking Destroys Your Teeth

Some nutritionists recommend eating five or six small meals throughout the day to help keep your metabolism going. Nevertheless, following this advice can be problematic for your teeth. You may be eating healthy foods all throughout the day. However, if you are constantly grazing instead of sitting down to eat regular meals, you are not giving your teeth a break that they need. Your mouth naturally begins to create more acid to help initiate the process of digestion. That acid remains in your mouth for a full 30 minutes after you finish eating, and it is not good for the enamel on your teeth. If you are putting in even just a few nuts or potato chips every half-hour, the result is that your mouth remains in that acidic state, making your teeth more prone to enamel breakdown. Instead of grazing throughout the day, eat at set times and then give your teeth a break.

Shutterstock

ADVERTISEMENT - CONTINUE READING BELOW

16. Eating Potato Chips

There are plenty of foods that you know are bad for your teeth. Anything with high levels of sugar (i.e. cookies, cake, donuts, brownies, ice cream, even ketchup, and barbecue sauce) leaves teeth susceptible to bacteria showing up and feasting on the sugar that is stuck to them. You know that you should brush and floss after eating foods with sugar, but what about savory foods, like potato chips? As far as teeth are concerned, the problem with potato chips is that they have a high level of starch. After all, potatoes are starch, and potato chips are just potatoes that are cut, fried, and well-seasoned. The starch in chips can easily get stuck in the crevices between your teeth and become a breeding ground for the bacteria that cause enamel breakdown and cavities. Further, starch breaks down into sugar, and we all know the harm that sugar poses to your teeth.

Shutterstock

ADVERTISEMENT - CONTINUE READING BELOW

15. Sipping Coffee

Plenty of us are addicted to caffeine and cannot imagine getting out of bed and actually being functional people without a morning cup of coffee. Recent studies reveal the many health benefits of drinking coffee, including the possibility of warding off Alzheimer’s disease! Yet there are several reasons why coffee is not so great for your teeth. One of those reasons is tannins, a polyphenol found in coffee, tea, and wine that causes discoloration. Tannins are the source of the yellowing and browning of the teeth associated with a lifestyle of drinking a lot of coffee. Another reason coffee is not so great for your teeth is its acidity. Coffee hits at about a 4 on the pH scale; neutral pH is 7, and acidity that starts to weaken enamel is 4. It means that coffee has enough a high enough acidity that it can cause the damage that ultimately leads to cavities.

Shutterstock

ADVERTISEMENT - CONTINUE READING BELOW

14. Drinking Soda Pop Destroys Your Teeth

Soda is one of the worst things you can put into your body, and not only for an acid content that is sufficient to dissolve baby teeth completely. It won’t dissolve adult teeth, but it will wear them down pretty badly. The sugar-acid duo in soda is enough to turn your mouth into a garden of cavities, leaving you with the need for significant dental work (and a considerable bill). Furthermore, in case you thought diet soda was an easy way out, diet soda can be even more acidic than regular! And lastly, the artificial colors in soda look more appealing than industrial sludge and byproduct. The artificial colors will stain your teeth, so if you are into having a nice smile and not destroying your body, just stay away from soda.

Shutterstock

ADVERTISEMENT - CONTINUE READING BELOW

13. Having a Nighttime Mouth Guard

If you use a nighttime mouth guard to prevent yourself from grinding your teeth at night, you may need to schedule an appointment with your dentist, especially if that mouth guard came over the counter without a prescription. The FDA does not monitor every single kind of mouth guard that hits the market. The problem is that wearing a mouth guard can lead to a problem called an open bite. An open bite means that your front teeth on top do not touch the corresponding teeth on the bottom, but the molars in the back of your mouth are constantly grinding against each other. Over time, a mouth guard can actually cause the molars to rise out of their regular position, leading to thousands of dollars in needed dental work. The problem is undoubtedly rare, but if you have been wearing a mouth guard, schedule a visit to your dentist. Even if your dentist approves the mouth guard, you should monitor its use to ensure that you are not developing an open bite.

Shutterstock

ADVERTISEMENT - CONTINUE READING BELOW

12. Using Toothpicks

The very word “toothpick” suggests that the item is something you should use to pick food out of your teeth. Many people rush to grab a toothpick when they have finished eating and want to ensure that they do not have a piece of spinach stuck in their teeth. Nevertheless, are toothpicks really something that you should be using in your mouth? Many dentists say no. Toothpicks can break off and get lodged inside your gums, basically creating splinters inside your mouth! Using toothpicks can also cause infections in your mouth, especially if everyone is grabbing from a community toothpick holder.

Shutterstock

ADVERTISEMENT - CONTINUE READING BELOW

11. Using Teeth as Tools

We’ve all done this one. You can’t get the ketchup packet open, so you use your teeth to rip it open. Alternatively, you don’t have a pair of scissors handy, so you use your teeth to cut through some Duct tape. Have you ever used your teeth to open a bottle? Now that one is an absolute no-no. Teeth are not tools. Well, not for anything outside digestive purposes. Tooth enamel is the hardest substance in the human body, but it is not for glass and metal. Your teeth will lose. Even if you can open a bottle with your teeth one or two times, you are damaging your teeth by, at a minimum, creating micro-fracture that will build up and cause serious problems. Teeth are for chewing and smiling, and using them in any other way can lead to severe problems.

Shutterstock

ADVERTISEMENT - CONTINUE READING BELOW

10. Drinking Cough Syrup

Not treating a serious cough can lead to problems ranging from hoarseness to pulling muscles in your back. Oftentimes, people grab cough syrup the second they begin coughing, even when the cough is not severe and will resolve quickly on its own. The problem is that cough syrup has tons of sugar. Companies that make cough syrup pile on the sugar to hide the awful taste of the medication that will alleviate the cough; otherwise, you would not be able to swallow the stuff. That sugar is good news for the harmful bacteria in your mouth that cause cavities and bad news for you if you want to avoid getting your teeth drilled. Don’t reach for the cough syrup right away whenever you have a cough. See if it will resolve on its own, and then try some natural remedies before turning to medication. Consider using cough drops, which have less sugar than cough syrup. If you need cough syrup, look for some low in sugar.

Shutterstock

ADVERTISEMENT - CONTINUE READING BELOW

9. Sucking Your Thumb Destroys Your Teeth

Does your child suck their thumb? You may not be too concerned unless other people are around who may look at you or your child disapprovingly. The problem with thumb-sucking is that it actually causes teeth to become misaligned. Thumb-sucking may be cute when your child is an infant or toddler. However, according to many dentists, the habit begins to be problematic for oral health by the age of four. Prolonged thumb-sucking, or excessive thumb-sucking for children under four, can lead to the condition known as an open bite. An open bite is when the top front teeth do not meet the corresponding bottom front teeth, but the molars do, and they grind against each other. The child’s palate can actually become narrower, leading to problems when the adult teeth begin to come in. These conditions can lead to speech problems, swallowing difficulties, and even sleep apnea. If your child is sucking their thumb, let the doctor know. The habit can affect your child’s quality of life.

Shutterstock

ADVERTISEMENT - CONTINUE READING BELOW

8. Overbrushing Your Teeth

We know that we should brush our teeth at least two times a day, preferably more, especially after eating sugary foods. However, did you know that there is such a thing as overbrushing your teeth? Dentists say that if you brush more than three times per day, you run the risk of actually harming your teeth! Excessive brushing can lead to abrasion of the enamel from the mechanical action of constantly swiping at it. Plus, too much fluoride can lead to discoloration. Additionally, if you are brushing too vigorously or the bristles on your toothbrush are too hard, you can create problems for your teeth. The fact is that very few people have to call their dentists with problems that arise from overbrushing. The problem is usually not brushing enough! But if you find that you desire to brush more than three times per day, you may need to schedule an appointment with your dentist to see if your compulsive brushing has damaged the enamel on your teeth.

Shutterstock

ADVERTISEMENT - CONTINUE READING BELOW

7. Grinding Teeth

Grinding the teeth is known as bruxism, and many people experience bruxism while they are asleep. There are many problems associated with bruxism, one being that the constant grinding of the teeth can begin to wear them away over time. If you are experiencing enamel loss alongside microfractures, your dentist may tell you that you are grinding your teeth at night and prescribe a night guard. If they do, make sure you ask lots of questions because night guards are also associated with dental problems, including the development of an open bite (see above). Another problem caused by grinding your teeth at night is inflammation of the temporomandibular joint (TMJ). It is located right next to your ear. This excruciating condition is characterized by a clicking sound whenever you open or close your mouth and can feel like an incessant ear infection.

Shutterstock

ADVERTISEMENT - CONTINUE READING BELOW

6. Smoking Destroys Your Teeth

If you haven’t heard the news that smoking is bad for you, well, it is probably the single worst habit you can ever develop, at least in terms of your body’s health. Smoking leads to heart disease, which is the leading killer of Americans. As if those problems were not enough to either quit today or never pick up a cigarette, the nicotine and numerous other chemicals in tobacco also cause oral cancer. Smoking also causes discoloration of your teeth and bad breath. That bad breath is an indication that smoking is creating an ideal environment in your mouth for harmful bacteria to thrive, leading to cavities and other forms of tooth decay. The best solution to all of the problems caused by smoking is to quit smoking. In the meantime, while you are trying to stop, make sure you brush and floss twice a day and have regular check-ups with your dentist.

Shutterstock

ADVERTISEMENT - CONTINUE READING BELOW

5. Piercing the Lip

Lip piercings may be trendy and cool, but it also creates severe trauma in your mouth and the surrounding area, sometimes leading to irreparable damage. Scar tissue can build up around the piercing, leading to potential dental problems. But serious issues emerge by playing with the stud; dentists have seen patients whose gums have receded away from their teeth because of playing with the stud of their lip piercing, and the damage can be irreversible. Some patients that like to catch the stud in their teeth have fractured and chipped their teeth. If you have a lip piercing, do not play with the stud at a minimum! If you do have a lip piercing and are not ready to get rid of it, some guidelines can help minimize the damage that it can cause. Make sure that you only use sterilized materials. This applies to the place where you get the piercing in the first place, as well as how you handle the piercing site afterward). If possible, use studs made of a material softer than metal, such as acrylic.

Shutterstock

ADVERTISEMENT - CONTINUE READING BELOW

4. Piercing Your Tongue

Like lip piercings, plenty of young people think that tongue piercings are trendy and cool, and they may even pierce themselves before they become aware of the consequences of getting a tongue piercing. They may even have both a lip and tongue piercing, and some young people even like to pierce their gums. People sometimes call these piercings “smilies.” Like lip piercings, tongue piercings can cause permanent damage to the teeth, especially if the person likes to bite down on the stud or play with it between their teeth. The result can be the erosion of the enamel, chipping, and fracturing of the teeth. There are other problems that tongue piercings can cause. One is that the piercing usually goes through major nerves in the tongue and can lead to numbness, loss of taste, and even how the mouth moves. Like with lip piercings, the damage can be permanent. Another problem is the genuine possibility of infection. Food is constantly passing through the mouth, along with lots of bacteria and viruses, and having a hole inside your tongue is asking for it to become infected.

Shutterstock

ADVERTISEMENT - CONTINUE READING BELOW

3. Consuming Large Amounts of Sugar

We have said this one before, and you have probably heard it repeatedly. However, sugar is one of the worst things you can eat for your teeth. It just might be the worst thing, short of battery acid. Nevertheless, the pH of some kinds of soda is not far from that of battery acid. Think of your mouth as a battlefield, and it is fighting to protect your entire body. When you eat sugar, you feed the enemy attacking your body, the bad bacteria. That harmful bacteria will feast on the sugar and proliferate inside your mouth until you end up with nasty cavities and the need for fillings.

Shutterstock

ADVERTISEMENT - CONTINUE READING BELOW

2. Eating Ice Cubes

Eating ice cubes seems harmless enough. You can get your cold fix without any of the sugar that you would typically find in ice cream and soda by munching down on some ice cubes. And let’s face it: some people are obsessed with ice. It might not be a full ice cube, of course. It seems as though soft drink cups filled with crushed ice will do the trick for those longing for that cold crunch. However, dentists say that eating ice cubes is pretty bad for your teeth. The habit may be a symptom of a medical issue, such as pica (eating things that are not usually considered foods and have no nutritional value). The ice can damage the nerves in your teeth and even lead to fractures and loss of enamel. Many people who eat ice do so because they are deficient in iron or because they struggle with anxiety.

Shutterstock

ADVERTISEMENT - CONTINUE READING BELOW

1. Biting Your Nails Destroys Your Teeth

Are you a nail-biter? If not, chances are good you know an individual who is one. It’s one thing to have a hangnail and want to correct it on the spot (if you don’t have clippers). However, you might even know someone who chews their nails down to the nubs, sometimes causing them to bleed. This bad habit is a big no-no, both for your nails and teeth. Your fingernails harbor more bacteria and viruses than you have ever heard of. What do you think happens to your mouth when you start using your teeth to bite them off? You bring all those nasty bacteria into it, setting yourself up for infection. To make things worse, your fingernails can both chip and crack your teeth and, when inside your mouth, cause abrasive damage that makes your mouth even more susceptible to infection. For people who have braces on their teeth, the potential for damage is even more significant. Go to the store, pay two dollars for a pair of nail clippers, and start clipping your nails like an adult.

Fitness

Strength Exercises You Don’t Need Equipment For that People Swear By

Going to the gym feels like more than just a chore. It can feel like a form of punishment, and with the price of some memberships,… Trista Smith - May 31, 2022

Going to the gym feels like more than just a chore. It can feel like a form of punishment, and with the price of some memberships, it can become much too expensive for people to afford. That’s part of the reason many people forego getting their exercise in because they believe that the only way to get fit is to go to the gym. The other alternative is that people build a gym at home, and that’s even more expensive. Luckily, there are plenty of exercises that you can do to get fit that doesn’t require gym equipment. In fact, you’ll get just as fit with these exercises as you would with some hardware set up in your garage. So to save you some time, here are 50 of the top strengthening exercises that you can do at home to build up your muscle strength.

Healthline

ADVERTISEMENT - CONTINUE READING BELOW

50. Leg Cross Twists

Russian twists are great for working out your abdominal in a low-impact way, and that’s because you’re sitting on the ground so that there’s less strain on your back. The leg-cross twists are a great alternative that can also help you work out your hip joints. Sit upright on the ground with your knees bent. Twist to the right and cross your right calf over your left. Twist back to starting position and uncross your legs. Twist to the left and cross your left calf over your right. Repeat for 10 to 12 reps.

PopSugar

ADVERTISEMENT - CONTINUE READING BELOW

49. Side Plank Hip Dips

Side plank hip dips are a great way to help shape your waistline as well as tone your shoulders. It’s a low-impact exercise, so it’s great to use as part of your warm-up routine. Remember that you don’t have to rush these; you can take as much time as you need and go at your own pace. Start in a side plank position on your right side. Keep your left hand on your hip. Lower your hip towards the ground, taking care of your shoulder. Lift your body to return to starting position. Do at least 20 to 30 reps and then switch sides.

The Workout Digest

ADVERTISEMENT - CONTINUE READING BELOW

48. Diamond Push-Ups

Diamond pushups are a great way to work those shoulder and back muscles if you aim for a well-defined back to show off in the summer. What makes them work so great is that you’re forcing them to work overtime by shifting your center of balance. You’re also putting more weight on your triceps, so this is an excellent workout for your arms. Start in the pushup/plank position. Instead of your hands being under your shoulders, shift them closer together to directly beneath your chest. Lower yourself to the ground so that your elbows form a diamond shape when bent. Then push off the floor and raise yourself back to starting position.

Whitney Thielman / Self

ADVERTISEMENT - CONTINUE READING BELOW

47. Forearm Plank Rocks

If you want an excellent way to work out your shoulders and strengthen your core, then the forearm plank rocks will help you get the job done. It requires a lot of concentration, but you can take your time performing these until you get used to how they feel. Start in a forearm plank on the ground. Your shoulders should be directly above your elbows. Slowly rock your entire body forward onto your forearms and then back. Keep your core tight this whole time in order to maintain your balance. Repeat this strength exercise 8 to 10 more times, or as many as you’re comfortable doing.

Whitney Thielman / Self

ADVERTISEMENT - CONTINUE READING BELOW

46. Elevated Plié Squat Pulses

Strengthening your thighs and glutes is the perfect way to help you maintain your balance when you’re doing other exercises. This strength exercise is also great to start your warm-up routine with, or you can use it as a cool-down exercise after a long run. Stand in a wide squat position and come on to the ball of your left foot. Bend your knees a few inches and squat slightly, remembering to keep your back straight instead of hinging at the hips like you would with a regular squat. Bounce 3 to 4 times and return to standing. Then repeat on the other foot.

Verywell / Ben Goldstein

ADVERTISEMENT - CONTINUE READING BELOW

45. Single Straight Leg Stretch Exercises

Pilates is a great way to strengthen and tone your muscles so that it isn’t going to strain them to the point of injury. It’s all about focusing on the contraction of muscles rather than using weights to make them stronger. This strengthening exercise is beneficial if you don’t have gym equipment at home. Lay flat on your back and your legs extended towards the ceiling. Lift your upper body until only the tips of your shoulder blades are touching the ground. Grab your right ankle or knee (whatever you can reach) and stretch your left leg out at a 45-degree angle. Pull your right leg towards you while keeping it straight. Hold for a few seconds, and then switch legs.

Tenor

ADVERTISEMENT - CONTINUE READING BELOW

44. Burpee Exercises

Burpees are a great exercise to help you burn calories. One goal to try to aim for is to do at least 20 burpees in a minute; extend that to 20 minutes, and you’ll end up burning as many as 250 calories. However, they are high-intensity, so they’re an exercise you need to work up to instead of starting as a beginner. Start in a squat position on the ground with knees bent. Lower your hands to the floor just in front of your feet and kick your feet back to land in a pushup position. Do one pushup, jump your feet back to your hands, then stand and reach your arms over your head as you jump. As soon as you land, go into the squat position again and repeat.

Katie Thompson / Self

ADVERTISEMENT - CONTINUE READING BELOW

43. Butt Kicks

Running in place is one thing, but butt kicks really help stretch out the muscles that run along the fronts of your thighs. You should start easy at first if you have a limited range of flexibility but aim for getting your heels higher and higher until you’re able to touch them to your butt. Run in place with your back straight. Kick your right heel as high as possible until it almost touches your right butt cheek. Repeat with your left heel; that is considered one rep. Keep running in place, doing about 20 reps, or however many you’re comfortable doing.

Healthline

ADVERTISEMENT - CONTINUE READING BELOW

42. Lying Side Leg Raises

Side leg lifts are great at working out your abdominals, thigh muscles, and glutes to get a complete workout for your lower body. This exercise can help loosen up any tight muscles you have, so these also work well as a warm-up exercise before you start the more high-intensity exercises. Lie on your side and extend your legs out, stacked together. Raise both of your legs together while maintaining the stack; go as high as you can, hold it for about 2 to 3 seconds, and then bring them back to the ground. Repeat for about 5 to 10 reps, then switch to the other side.

Gfycast

ADVERTISEMENT - CONTINUE READING BELOW

41. Arm Circle Exercises

Although arm circles are pretty easy to do, they do a great job of working out the muscles in your shoulders. They’re a great warm-up exercise that you should add to any routine and help your shoulders and back remain limber while you go through your regular workout routine. Stand with your feet together and raise your arms up and out to the sides. Your body should make the letter T. Move your arms in small circles going forward, about 15 to 20 times. Then rotate in the other direction. To increase the difficulty, you can increase the size of the circles with your arms.

Kelsey McClellan / Self

ADVERTISEMENT - CONTINUE READING BELOW

40. Lateral Plank Walk

Those who are great at planks may want to start challenging themselves with the lateral plank walk. It forces you to tense up your core to maintain your balance and puts your hips and shoulders to good use. You can start this exercise with small steps and then work your way up to making wider movements to put your body to work. Start in a planking position. Then take a step to the right using both your right hand and right foot, followed by your left hand and left foot. Do this two to three more times to the right, then repeat in the opposite direction.

PopSugar

ADVERTISEMENT - CONTINUE READING BELOW

39. Walkout Plank Exercises

Before you can start exercising, especially if you’re planning to do planks, you must warm up first. Taking care of the muscles in your body means preparing them for any exercise you’re about to do. Performing the walkout plank prepares all of your muscles for the work they’re about to do. Stand at the edge of your mat with your arms stretched towards the ceiling. With your back straight, bend forward at the hips and bring your hands to the ground. Walk your hands forward to move into the plank position, taking your time so that you can properly stretch out your calves. Then walk your hands back to your feet and slowly roll your body back up into a standing position.

24lift

ADVERTISEMENT - CONTINUE READING BELOW

38. Modified Dead Bug

The modified dead bug is a low-key workout that will help you focus on your core without putting any strain on the muscles in your body. You’ll help strengthen the deep muscles in your body and help them stay in alignment for better posture. Start on your back with your arms and knees bent at 90-degree angles above you. Drop your left arm and bring your left hand towards your face. At the same time, drop your right foot to hover just above the ground. Bring your hand and knee back to starting position and then alternate with the other arm and leg.

Active

ADVERTISEMENT - CONTINUE READING BELOW

37. Scissor Kicks

Scissor kicks are a great way to work on your thighs as well as your abdominal in a low-impact way. It takes a few minutes and an open floor space, and you’re ready to start scissor-kicking your way to a stronger core. You can increase the difficulty of this exercise by lowering your legs as close as you can get them to the floor. Lie on your back and place your hands under your butt for support. Keep your legs straight and lift them a few inches off the floor. Kick your legs to the sides and bring them back to the center; repeat this for about twenty seconds.

Greatist

ADVERTISEMENT - CONTINUE READING BELOW

36. Corkscrew Exercises

The corkscrew is a great way to strengthen your abdominal and increase the difficulties of your workouts without putting even more strain on the rest of your body. This exercise does require a lot of practice and balance, so start slowly and ease your way into getting accustomed to the movement itself. Start in a planking position and then shift your weight onto your left hand. Rotate to the right and kick your left foot to the right. Touch your left foot with your right hand, return to starting position, and switch to the other side.

Greatist

ADVERTISEMENT - CONTINUE READING BELOW

35. Long Jump with Jog Back

One great way to get some cardio into your day is with the long jump with jog back. This exercise will get your heart rate going as well as strengthen your core by putting your balance to the test. You will need a bit of floor space in your living room since some jumping is involved. Stand with your feet slightly apart, and your knees slightly bent. Bend your knees, swing your arms back, and jump as far forward with both feet. Aim to land on the balls of your feet to minimize knee strain. Then quickly jog backward back to your starting spot. Repeat as often as you’re able.

Healthline

ADVERTISEMENT - CONTINUE READING BELOW

34. High Plank to Low Plank

Planks are great for building strength, especially in your shoulders and your stomach, and they do much better than just pushups. High planks to low planks are easy exercises to do that will really put your muscles to work since you’re supporting your entire body weight throughout the movement. Start in a planking position, upon the palms of your hands. Tighten up your core and drop yourself down into a forearm plank, one arm at a time. Hold it there for a few seconds, then push yourself back onto your palms. Tighten your abdominal the entire time.

Katie Thompson / Self

ADVERTISEMENT - CONTINUE READING BELOW

33. Tuck Jump Exercises

The tuck jump isn’t an exercise that beginners should perform, as it requires a lot of core strength and being aware of your body. It’s not an exercise that’s fit for people with knee or ankle issues, as it is very high-intensity as well as high-impact on those parts of your body. Stand with your feet slightly apart, with your arms slightly bent by your sides. Bend your knees until you’re almost in a squat, and then jump as high as you can while keeping your arms in place. The goal is to get your knees as close to your elbows as possible. Land with soft knees and sink back into a squat. Repeat as often as you feel comfortable.

Katie Thompson / Self

ADVERTISEMENT - CONTINUE READING BELOW

32. Split Squat Jump

The split squat jump is another high-impact exercise that you should wean into instead of using in a warm-up routine. It’s great at keeping your hip joints and knees strong, as well as toning your calves and abdominal. Start with small jumps and work your way up to higher ones, at your comfort level, of course. Step with your left foot forward until you’re in a lunge position. Make sure that your feet aren’t too far apart; your knees should be at 90-degree angles. Push up with your feet and jump into the air as high as possible, swinging your arms to help you gain momentum. While in the air, switch your right leg to the front and left leg behind you. Land softly back in the lunge position.

PopSugar

ADVERTISEMENT - CONTINUE READING BELOW

31. Glute Kickback Pulse Exercises

Working out your glutes is an essential part of a complete routine. After all, your glutes are what connect your upper body to your legs. Strong glutes help you to bend down to reach things low on the ground, as well as to help you maintain your overall balance. That’s why the glute kickback pulse can help you improve your derriere’s shape. Start on the ground on your hands and knees. Set your spine into a neutral position. Extend your right leg behind you and upwards until it creates a straight line with your spine. Hold for a few seconds and lower it back to the ground. Then switch to the next leg.

Active

ADVERTISEMENT - CONTINUE READING BELOW

30. High Knees

Running in place is one thing, but the way to really get your heart going is to do high kicks. Think of it like running upstairs without there being any stairs. It’s a great way to get some cardio in if you don’t have any gym equipment in your home, so you’ll definitely feel the burn with this exercise. Run in place, but aim to bring your knees up to your hip level. That is until they’re almost at a 90-degree angle. Also, pump your arms like you’re sprinting, with your elbows at a 90-degree angle. It’s good to start slow and then increase your pace to a comfortable speed.

Openfit

ADVERTISEMENT - CONTINUE READING BELOW

29. Side Plank Leg Raise

This plank will help you work on your obliques, glutes, and abdominal for better balance. That’s because side planks for you to focus on your core to prevent yourself from falling over. If you want to start a little easier, you can do this exercise with your knee on the ground. Assume a side plank position on your left side with your right arm extended towards the ceiling. Lift your right leg as high as possible, then slowly place your right foot on the ground in front of you. Return to starting position and then put your right foot on the floor behind you. Repeat a few more times and then switch sides.

ADVERTISEMENT - CONTINUE READING BELOW

24life

28. Dolphin Pose

The Dolphin Pose combines planking with back and leg strengthening exercises that still work your abs. This strength workout is definitely an exercise you should only complete after warming up properly. However, it’s also a lot easier to do than a plank so you can do these as a warm-up to planking. Start on the ground, resting your weight on the balls of your feet and your forearms. Your body should form an inverted V-shape, and you should clasp your hands together for added stability. Lower your body to the ground until your chin is above your hands. Hold for two seconds and then return to the starting position.

Gfycat

ADVERTISEMENT - CONTINUE READING BELOW

27. Back Extension Exercises

If you find that you’re suffering from back pain at the end of your day, you should probably stretch out your back muscles. Nothing is worse than trying to fall asleep and not being able to get comfortable because your back aches terribly. This back extension exercise is perfect for helping your back relax and not be all twisted up. Lie facedown on the ground with your arms by your sides. Allow your body to relax completely. Then, while exhaling, lift your upper body off the ground as high as possible without moving your legs. Hold it for a few seconds, and then slowly lower yourself back to the ground.

PopSugar

ADVERTISEMENT - CONTINUE READING BELOW

26. Frogger

Are you worried about your abs and glutes after not doing any exercise over the winter? The frogger should help you tone those back up in no time, and all you need is a few minutes of doing this exercise every day to help get them back into shape. Start in a pushup position, with your hands directly underneath your body. Your back should be perfectly straight. Jump your feet to the outsides of your hands so that you end up in a deep squat position. Then jump your feet back into the plank position to start again. Repeat as often as you’re able.

Healthline

ADVERTISEMENT - CONTINUE READING BELOW

25. Plyometric Exercises

Plyometrics are not easy exercises and require a lot of experience and practice. It’s a high-impact exercise, so you should not take this specific workout lightly. You have to have a lot f upper body strength in order to complete these exercises correctly. Get into the plank position on your hands and the balls of your feet. Bend your elbows until your chest almost grazes the floor, and try as hard as you can to push your upper body and hands off of the ground. Land on the ground and bend your elbows to soften your landing.

Healthline

ADVERTISEMENT - CONTINUE READING BELOW

24. Wide Pushup

Wide pushups are much more challenging to do than standard pushups, and this is because you have less support under your torso to help you stay upright. It’s an easy way to make pushups more difficult without taking any drastic steps or buying extra equipment. Start on your hands and feet on the ground as if you’re doing a pushup. Place your hands on the floor wider than your shoulders. Don’t go too far to the point that you can’t support yourself adequately. Lower your body to the ground, hold for a few seconds, and then return to starting position.

PopSugar

ADVERTISEMENT - CONTINUE READING BELOW

23. Donkey Kicks

Donkey kicks are a great way to work your glutes but without doing a ton of painful work. Not to say that exercising doesn’t work, but if you’re stuck at home with no gym equipment, it can be challenging to figure out what kind of exercises you can do. Start on your hands and knees on the ground. Your back should be flat. Engage your core and lift your right left while still keeping your knee bent at a right angle. Bring it back as far as you can, hold it for a few seconds, and return it to the ground. Switch to the other leg and repeat on both sides for about 30 seconds.

Greatist

ADVERTISEMENT - CONTINUE READING BELOW

22. Plank Jack Exercises

You’re probably used to doing jumping jacks, but planking jacks are a lot different. It’s the combination of jumping jacks and planks simultaneously, so you’re definitely working out more of your body. You’ll feel it in your core, shoulders, and legs. Start in a planking position with your hands under your shoulders. Concentrating on your core, jump your feet apart and then jump back together again. Try to maintain level hips as you do so. You can increase the difficulty by increasing the width of your jumps.

Greatist

ADVERTISEMENT - CONTINUE READING BELOW

21. Mountain Climber Twist

The mountain climber twist will not only work your legs and abs but also the side muscles of your torso as well. This strength exercise will increase your range of flexibility and help your muscles to stay limber so that you’re not experiencing any aches and pains from just going about your day. Start in a plank position on your hands and feet. Bring your left knee towards your right elbow and twist your lower body to the right. Go back to starting position and then switch legs. Try to alternate as quickly as possible without raising your hips, almost like you’re running in a plank position.

Verywell / Ben Goldstein

ADVERTISEMENT - CONTINUE READING BELOW

20. Walking Lunges

Walking lunges are an excellent way to target all of the large groups of muscles within the body, and all without any exercise equipment. It’s a great way to get your heart rate up, too, thereby increasing your endurance so that you can work out for much longer in the future. Stand with your feet together and your hands on your hips. Take a large step forward with your right foot and lower your body to a lunge, bending both knees. Extend your right knee to stand and then swing your left foot forward to take a step forward into another lunge. Continue for 10-15 more reps.

Greatist

ADVERTISEMENT - CONTINUE READING BELOW

19. Perfect Forward Lunge Exercises

Lunges are single-leg exercises that help you build your lower body and endurance. It’s a great way to warm up your legs before you’re ready to engage in more high-intensity exercises. You’re preparing your hip joints and knees before you’re prepared to put them to work. Stand with your feet together and engage your core. Step forward with your right leg and lower your body until both knees are at a right angle. Refrain from letting your left knee touch the floor. Stand up and return to starting position, and then switch to the other leg.

Openfit

ADVERTISEMENT - CONTINUE READING BELOW

18. Single-Leg Skater Jumps

You may believe that it’s impossible to do any kind of skating without an ice rink. However, for skater jumps, you don’t need any extra gear. All you need is some room and the gumption to give this exercise a try. It’s definitely going to help you burn some calories if you’re looking to lose a few pounds. Stand and shift your weight to your left leg. Bend your left knee and raise your right leg off of the ground. Push off your left leg and bound to your right side. Land on your right leg and cross your left leg behind you. Pause and then repeat the same movement in the other direction. Continue back and forth for 10 to 15 reps.

Ryan Kelly / Power Cardio / Daily Burn

ADVERTISEMENT - CONTINUE READING BELOW

17. Step Jack to Star Jumps

Step jacks make an excellent way to warm up before you get down to the nitty-gritty of your exercise routine. They’re easy to do, and you can increase the difficulty to help you burn even more calories. These warm-ups are ideal for your glutes, calves, and inner thighs. Stand with your feet together and your hands at your sides, your palms facing forward. Raise both arms, keep them straight, and lift your right leg. Return to starting position, and then repeat with your left leg. If you want to increase the difficulty, jump with arms and legs spread wide like a jumping jack, but return them together before you land.

Ryan Kelly / Power Cardio / Daily Burn

ADVERTISEMENT - CONTINUE READING BELOW

16. Lunge to Plyo Lunge

Squats and lunges have always been a great way to get your legs and glutes warmed up for the day. Plyo lunges do a better job because you’re engaging more of your body. It’s all about pushing your body to its limits so that it can work harder in the future. Start by doing lunges: extend your right foot forward and lower your body, return to starting position and repeat on the other leg. To make a plyo lunge, just skip out the middle step. Switch your legs in midair instead of bringing them together in the starting position.

Healthline

ADVERTISEMENT - CONTINUE READING BELOW

15. Curtsy Lunge Exercises

The curtsy lunge may sound like a silly name for an exercise, but it’s actually pretty good at working your quads and glutes in a low-intensity way. This strength exercise will increase your stability and balance so that you can engage in more challenging activities, as well as maintain your core as you age. Stand with your feet slightly apart and your arms at your sideStep back with your left foot like you’re doing a curtsy, and lower your body as you bend your knees. Raise your arms to help you balance, and then return to the starting position. Switch legs and repeat on the other side.

Men’s Health

ADVERTISEMENT - CONTINUE READING BELOW

14. Band Mountain Climber

Using a resistance band can help to make your workouts a lot more intense. It can provide you with the effects of weights without buying weights, and a resistance band can be folded up and stored in a drawer out of the way. So when you add a band to the mountain climber exercise, you’re definitely going to put your body to work. Hook your thumbs through a resistance band and loop it around your torso, behind your back. Go into the pushup position and, with your hands completely straight, lift your right foot, raising your knee to your chest. Return to starting position and repeat on the other leg.

Healthline

ADVERTISEMENT - CONTINUE READING BELOW

13. Bird Dog Exercises

The bird dog is a simple exercise that works on your core and improves your stability. It’s low-impact, so it also works outstanding as a warm-up exercise or if you’re just interested in doing yoga. It’s also an exercise that’s great at relieving chronic lower back pain. Get on the floor on your hands and knees. Raise your right arm and your left leg, keeping them parallel to the floor. Hold it for a few seconds and return to starting position. Then switch to your left arm and right leg, hold, and return to starting position. Repeat 8 to 12 more times.

Healthline

ADVERTISEMENT - CONTINUE READING BELOW

12. Single-Leg Squat

Doing squats works perfectly on your glutes, but you can intensify the exercise with single-leg squats. They require a lot of balance, so you’re also engaging your core in the process. But you can add a dumbbell or medicine ball to the mix to up the difficulty level. Stand on your right foot and lift your left leg straight out in front of you. Lower yourself into a squat position by bending your right knee. Aim for getting low enough so that your hips are parallel to the ground. Stand back up and repeat five more times, then switch to the left leg.

Anabolic Aliens

ADVERTISEMENT - CONTINUE READING BELOW

11. Single-Leg Deadlift

The single-leg deadlift is a variation of a regular deadlift; only you’re doing it on one leg. The exercise forces you to be aware of your body as you try to maintain your balance. The goal is to keep your back as straight as possible to avoid injury from taking place. Start with your feet a little apart, with your hands at your sides. Slightly bend your right knee and extend your left knee out behind you while keeping it straight. Lean forward at the hips at the same time until you’re parallel with the floor. Return to starting position, switch legs, and repeat.

PopSugar

ADVERTISEMENT - CONTINUE READING BELOW

10. Single-Leg Bridge

Are you interested in working out your glutes and your hamstrings? They can get pretty tight and underutilized if you’re not putting them to work. The single-leg bridge will help sculpt and tone the muscles within so that you can have a fabulous booty that you’ll love to show off to the world. Lie on your back and place your hands on the floor for added stability. Bend your right leg and straighten your left leg towards the ceiling. Pressing the heel of your right foot into the floor, lift your pelvis off the floor as high as you can, keeping your upper body on the ground. Slowly lower to the floor and repeat about ten times before switching to the other side.

Openfit

ADVERTISEMENT - CONTINUE READING BELOW

9. Squat Thrust Exercises

Squat thrusts are similar to burpees, except without the jumping part at the end. It’s not an exercise for a beginner, but it’s great at getting your heart rate up once you’ve warmed up properly. It focuses on your abdominal, legs, and glutes but is also good at toning your shoulders. Stand with your feet slightly together and lower your body into a squat position. Then, place your hands on the ground in front of your feet. Jump your feet backward until you’re in the pushup position. Jump again, bring your feet back to your hands, and then stand. Repeat the exercise a few more times.

Self

ADVERTISEMENT - CONTINUE READING BELOW

8. Reverse Lunges to High Knee

If you find that your hamstrings and glute muscles are feeling a little tight, then reverse lunge to high knees is the perfect exercise to loosen them up. This exercise is excellent at getting your legs limber, especially if you plan on doing a lot of running. Stand with your feet apart and your hands on your hips. Lunge backward with your left foot until both knees are at 90 degrees. Bring the left foot forward as you straighten your right leg and bring your left knee as high as it can go. Repeat 8-10 times and then repeat on the other leg.

PopSugar

ADVERTISEMENT - CONTINUE READING BELOW

7. Wide-Narrow-Wide Squat Jumps

Your thighs and knees are definitely going to burn after performing a few wide-narrow-wide squat jumps. This exercise will strengthen the muscles in your hips as well, but it’s primarily designed to keep your legs toned and strong. Only do this exercise at a level you’re comfortable with so that you don’t risk injury. Stand with your feet shoulder-width apart and your hands at chest level. Lower into a squat and then jump, bringing your feet together. Land with bent knees into a squat, then jump again and spread your feet again back into starting position.

Vissco

ADVERTISEMENT - CONTINUE READING BELOW

6. Wall Squat Isometric

Keeping your hips limber is the key to maintaining your balance. Weak hips mean that you don’t have a lot to stop you from falling. Using a wall helps you to warm up to this exercise so that you can end up doing it on your own without the assistance of a wall. That’s why wall squat isometrics are important. Stand with your feet apart, as wide as your hips, and with a wall behind you. You should fold your arms should go over each other at chest level. Squat until your knees are at 90 degrees and your back comes into contact with the wall. Hold for a few seconds and stand back up to the starting position. Repeat as many times as you’re comfortable doing.

Healthline

ADVERTISEMENT - CONTINUE READING BELOW

5. Air Squat Exercises

Air squats aren’t for the faint of heart. They’re mostly used in CrossFit because you’re using your own body weight to help your muscles work out, and you should do these strength training exercises after you’ve warmed up effectively. Keeping proper form is also crucial so that you don’t put any strain on your back. Keep your feet shoulder-width apart and clasp your hands together. Squat like you’re sitting in a chair, but don’t lean too forward. Aim to get your knees at 90 degrees, and your thighs are parallel with the floor. Hold for a few seconds and then return to starting position.

PopSugar

ADVERTISEMENT - CONTINUE READING BELOW

4. Two-Point Touch Plank

Summer is the time to show off those abs, and you can definitely achieve that sic pack by adding these two-point touch planks to your everyday routine. It’s vital that you start slowly to get used to your sense of balance and how your body will react to the exercise. Don’t jump into them too quickly. Get into plank position. Bring your right knee up to your chest and bend your left elbow to try and touch your right knee. Then extend your right leg straight behind you and your left arm straight in front of you so that they form a straight line with your back. Return to plank position and switch to your left leg and right arm.

PopSugar

ADVERTISEMENT - CONTINUE READING BELOW

3. Glute March in Bridge

Performing a glute march in bridge is a great way to get that curvylicious booty you’ve always been aiming for to fill out that pair of jeans. It’s a great exercise to tone your glutes, work on your abs, and help you to stretch out the muscles in your back as well. Lie on your back with your arms out to your sides, palms up, for added balance. Bend your knees and lift your pelvis off the ground. Then perform a march, lifting your left leg first and then your right leg, keeping your pelvis off the ground the entire time.

Katie Thompson / Self

ADVERTISEMENT - CONTINUE READING BELOW

2. Alternating Toe Touch Crunch

Crunches are pretty easy to do, so it’s time to step up your game and take them to the next level with these alternating toe touch crunches. Don’t feel like you have to get these perfect the very first time. This is a flexibility test, so it’s essential that you work your way up to them over time. Lie on your back and extend your legs straight up towards the ceiling. Place your hands behind your head. Perform a crunch while keeping your legs straight, and try to touch your right foot with your left hand. Lower yourself back to the ground and repeat with the opposite hand. Repeat as often as is comfortable.

Katie Thompson / Self

ADVERTISEMENT - CONTINUE READING BELOW

1. Bicycle Crunch Exercises

Bicycle crunches are also a great way to work on your abdominal without putting a lot of strain on your back. Keeping your legs engaged during the exercise will help you burn more calories and help develop the muscles along your sides for improved balance. Lie on your back with your knees bent at 90 degrees. Place your hands behind your head and curl your shoulders off the floor. Twist your right elbow to touch your left knee while straightening your right leg. Then twist your left elbow to your right knee, straightening your left leg. Go at a slow pace and repeat 10 more reps.

Advertisement